
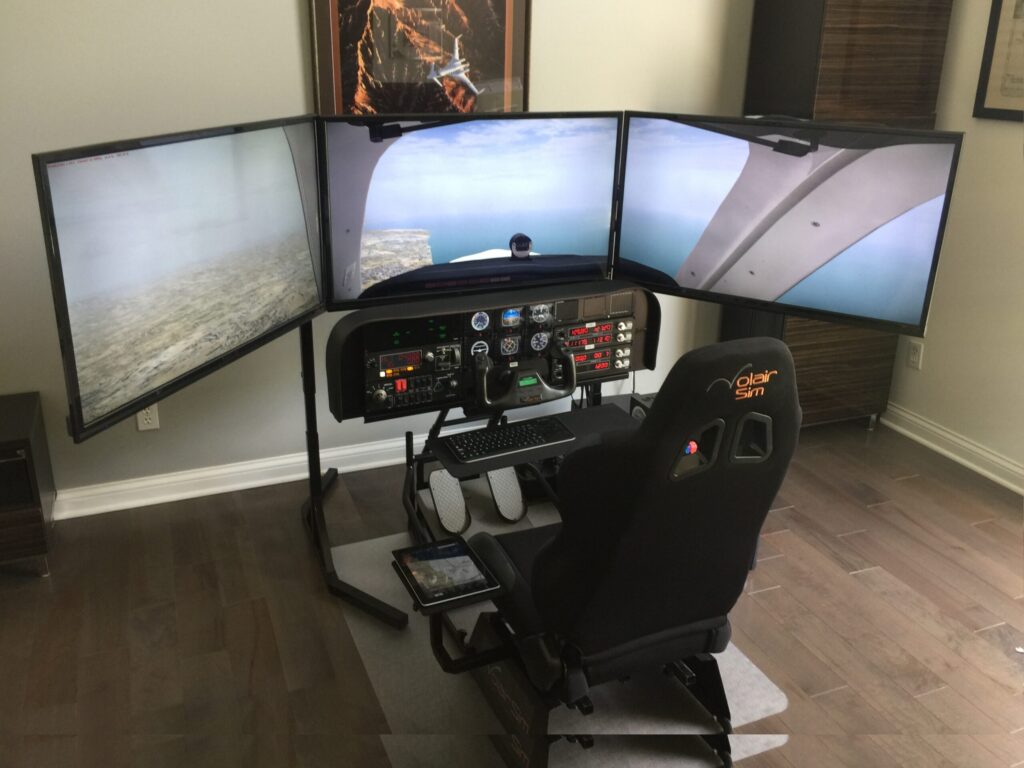
A typical modern graphics card supports from three to six monitors. For example, an nVidia GeForce GTX 1070 (a popular choice) supports up-to four monitors. See the connections on the back of the card below:

The card features one DVI port, three HDMI ports and one DisplayPort. The DVI and HDMI port are shared so you can have a maximum of four independent connections.
To configure the system in a multi-monitor set-up, install the drivers that came with the graphics card and then simply plug the monitors or TVs individually to the corresponding ports on the back of the graphic card. You may have to buy adapters that go from the DisplayPort to HDMI as they DisplayPort and HDMI are physically slightly different plugs. Alternatively, you can also purchase DisplayPort to HDMI cables and connect your monitors or TVs directly:

After connecting the monitors, it is time to configure the monitors. First, open the NVIDIA Control Panel. You can do this from the pop-up menu when you right-click on the desktop.
First, under the Display category, select “Set-up multiple displays.” Next, Check the box next to the inactive display you wish to activate as a secondary display and click apply. Note, if your display is not shown, click “My display is not shown…” to force display detection. You can drag the green boxes around to match the physical arrangement of your displays, and choose which one is primary by right-clicking on it and selecting “Make Primary.” The primary display will have a “*” in the top right corner on the display as shown below:

Now that we have the displays enabled and organized in the right order, we can work on getting the Surround mode enabled so that the entire multi-monitor set-up will function as one large desktop. In the Surround mode, the resolutions of monitors get added together to form a single virtual monitor or desktop. Therefore, three 1920×1080 monitors in the surround mode will have a 5760×1080 resolution.
Next, under 3D Settings, select “Configure Surround, PhysX”. Select “Span displays with Surround” and click “Configure”

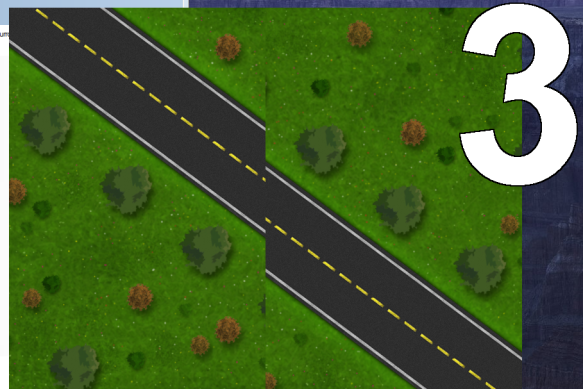
You will now be able to confirm the display layout and order and perform a very important step called “bezel compensation.” Bezel compensation, as the name suggests, allows you to virtually “remove” the bezels of the adjacent monitors. The bezel correction is performed via adjusting the two “roads” as shown below so that they seamlessly flow from one display to the other. Use the up/down buttons on the bezel correction window until the road lines up perfectly from one monitor to the next. You can link the bezel correction to have the same factor for both monitors or adjust these individually.
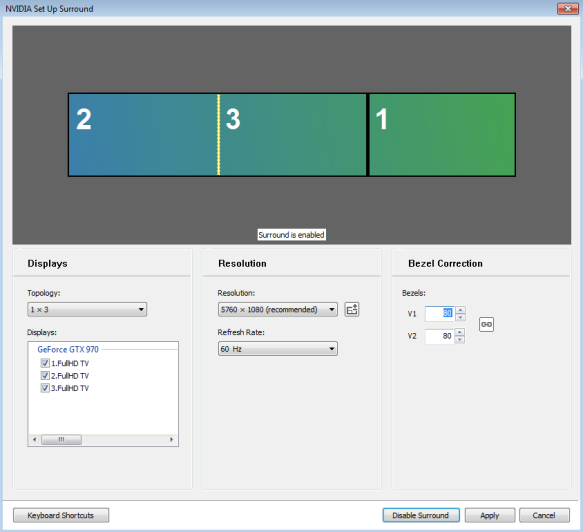
In the example above, the bezel compensation for each monitor is 80 pixels and the resulting horizontal resolution is 5760 + 2×80 = 5920 pixels. This will be the resolution you will set in the flight sim so that you will achieve a seamless view across all three monitors. Below are the corresponding display settings for Prepar3D and X-Plane 11.


Note: X-Plane allows use to set-up each of the three monitors individually which is a great option for cockpit builders (e.g. for an enclosed cockpit with physical windows) where a dedicated monitor will show a view from a window. In the simple GA installation where an external view is comprised of a joined set of monitors, this option did not seem as flexible as the Surround option above as any small adjustment to forward view made the side monitors lose their location with the forward view one.